


How to Clean Out a Storage Shed and Reorganise into a Storage Sanctuary
From Clutter Chaos to Storage Sanctuary
For many homeowners, the backyard shed starts as a beacon of extra storage, a place for all those bits and bobs that don’t quite fit in the house. But, almost inevitably, it transforms into a dusty, spiderweb-laden abyss where tools vanish, gardening supplies get lost, and that extra bag of potting mix is never where you think it should be. It’s time to reclaim that valuable space!
Cleaning out and creating the ideal storage shed isn’t just about tidiness; it’s about efficiency, extending the life of your equipment, and making your outdoor tasks a breeze.
Let’s transform your shed from a dreaded dumping ground into a truly organised shed for optimal storage.

How to Create the Ultimate Storage Shed
Step 1 – Empty the Shed
Our journey to shed salvation begins with the most daunting, yet essential, step: emptying the entire shed. Yes, every single item needs to come out. Drag it all onto the lawn, a tarp, or a cleared patio area. This isn’t just to make cleaning easier; it allows you to truly see the accumulated volume and condition of everything you own. As you pull things out, give a mental nod to the beautiful weather, hoping it holds for your grand shed reorganisation! This full emptying is crucial for effective shed cleaning and decluttering tips.
Step 2 – Declutter
With everything outside, it’s time for a ruthless decluttering purge. Handle each item and ask yourself: “Have I used this in the last year?” “Is it broken beyond repair?” “Do I actually need this?”
Create three piles: “Keep,” “Donate/Sell/Recycle,” and “Rubbish.”
Be honest. That rusty old trowel, the paint cans from a house colour you no longer have, or the cracked garden pots that have been sitting there for years – they need to go. For usable items, consider donating to local charities or listing them on community groups. For rubbish, assess if you need a specific waste disposal method or if it can go into your regular council bins. Getting rid of unnecessary items is the cornerstone of effective shed organisation.
Step 3 – Shed Cleaning
Once the shed is gloriously empty, it’s time for a thorough shed cleaning. Arm yourself with a broom, dustpan, and a good old-fashioned scrubbing brush. Sweep out all the cobwebs (those spiders love sheds!), dust, leaves, and debris. If you have a leaf blower, it can be surprisingly effective for clearing out corners quickly. Inspect the floor, walls, and ceiling for any signs of water damage, mould, or pest entry points. For general cleaning, a bucket of warm soapy water (using your regular dish soap) will work wonders on dusty shelves and surfaces. If you spot any mould, a mix of white vinegar and water can be effective. Ensure the shed is completely dry before you start putting things back, preventing new moisture problems. This deep clean is vital for maintaining a clean shed.
Step 4 – New Storage Solutions
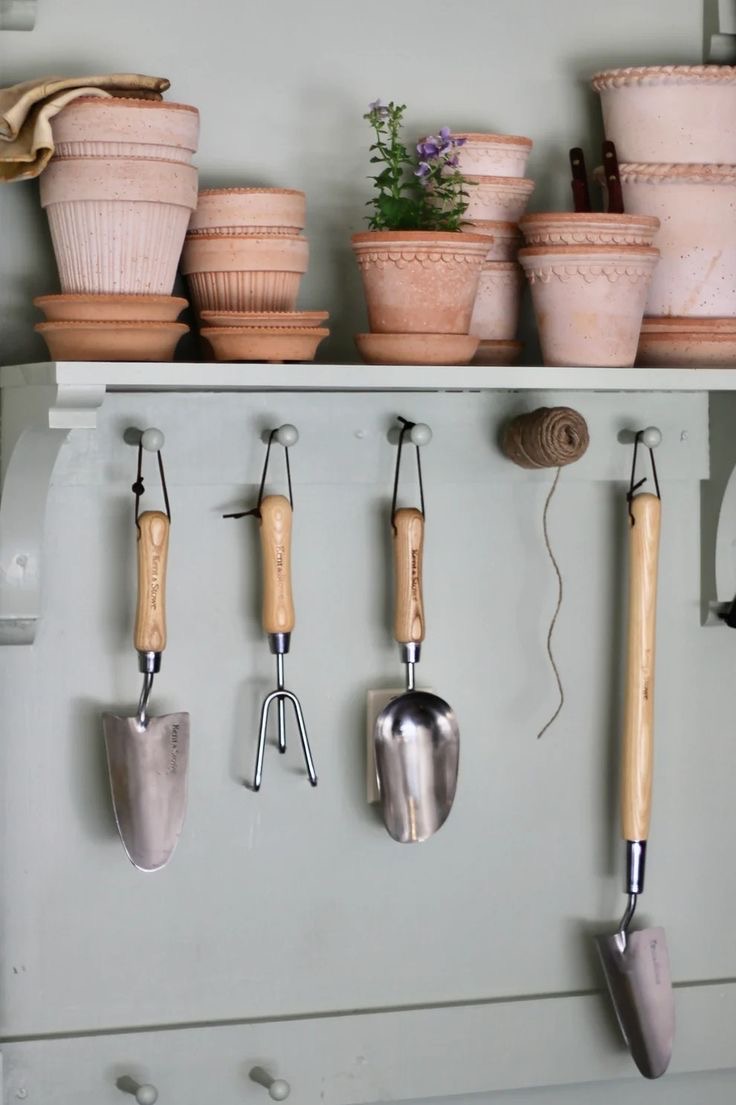
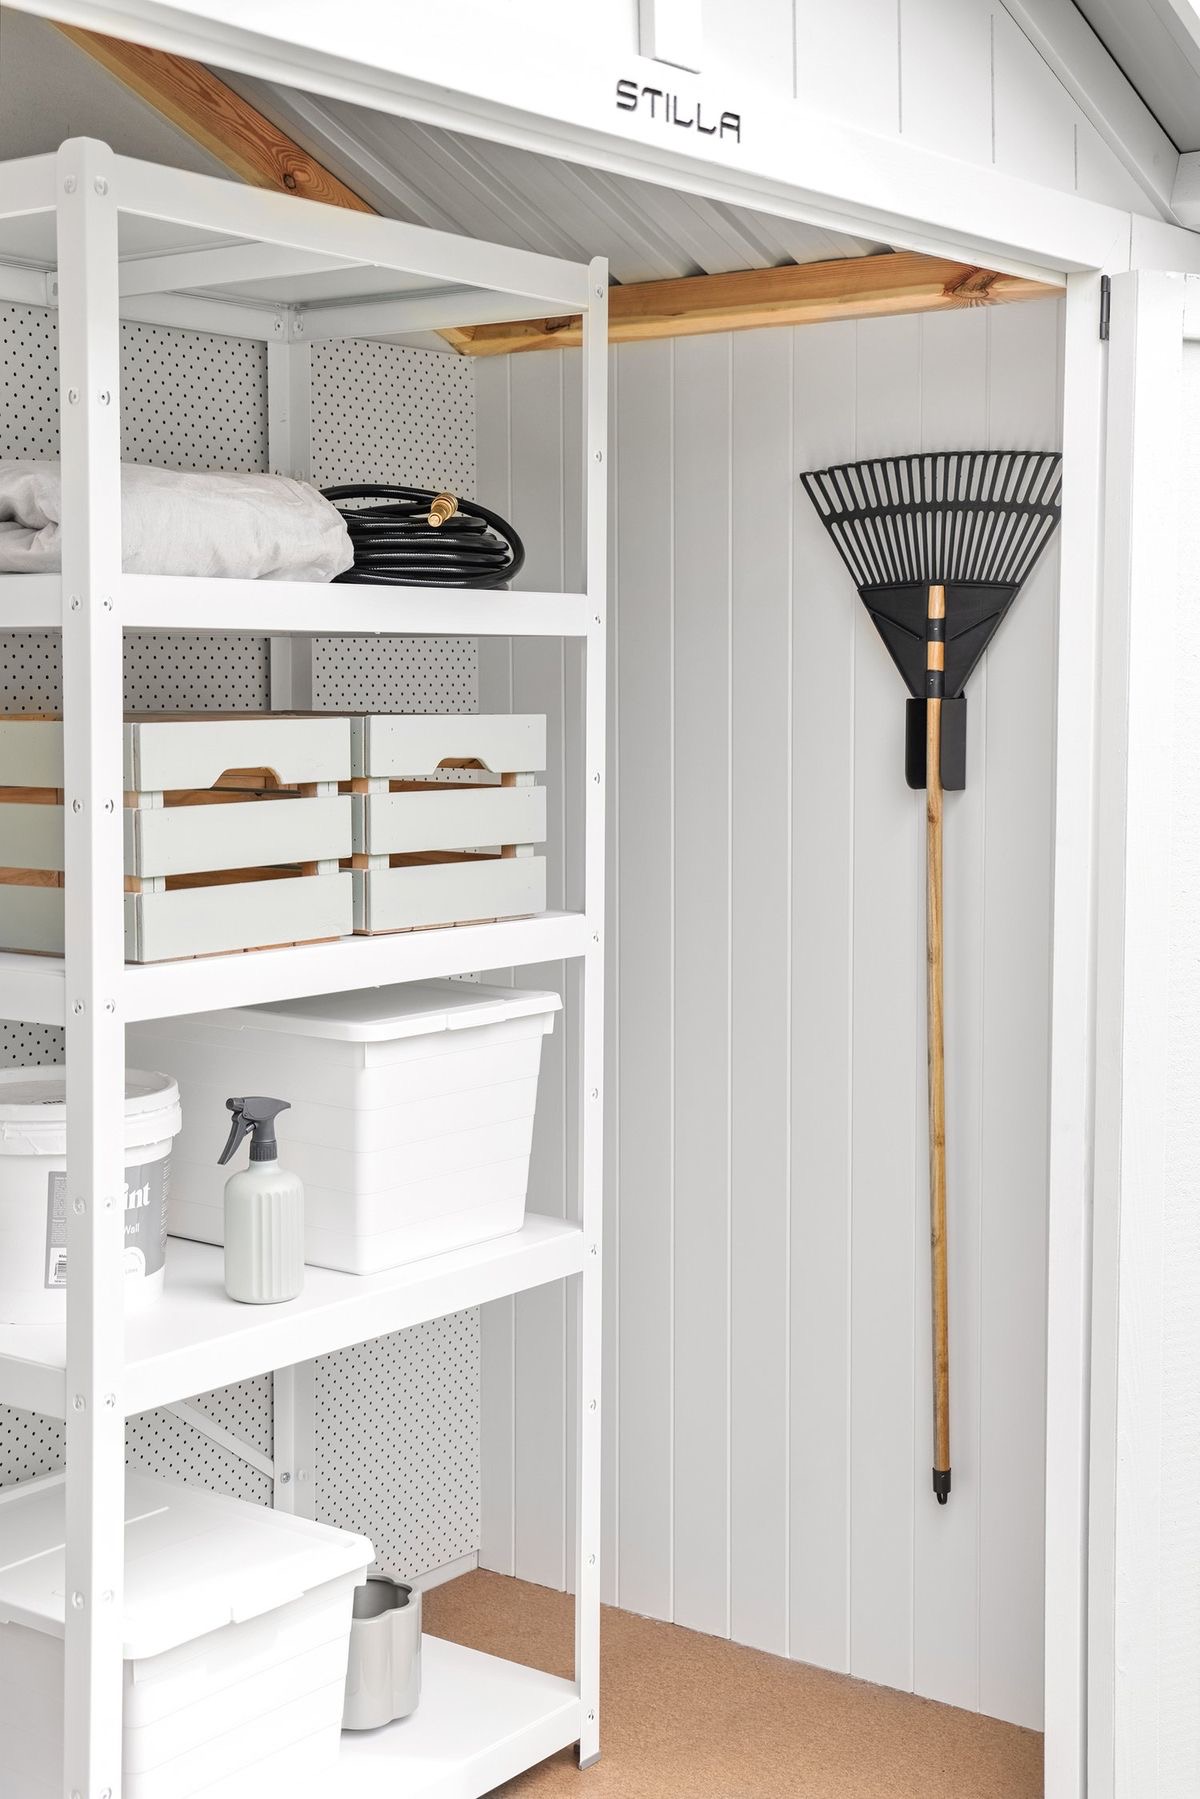
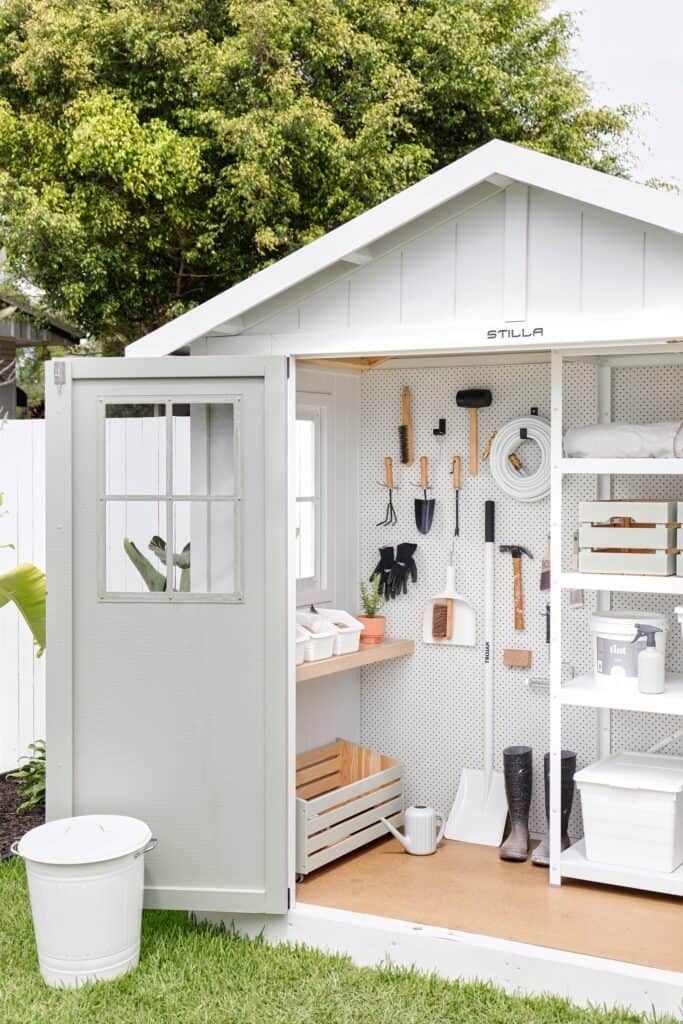
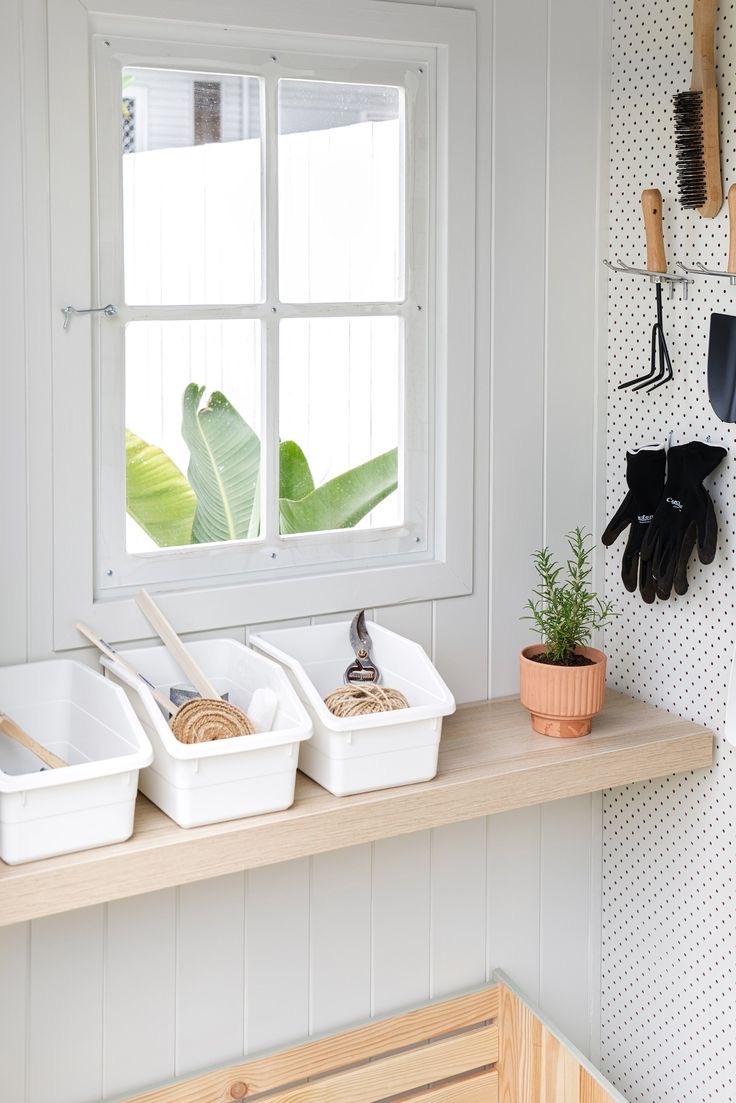
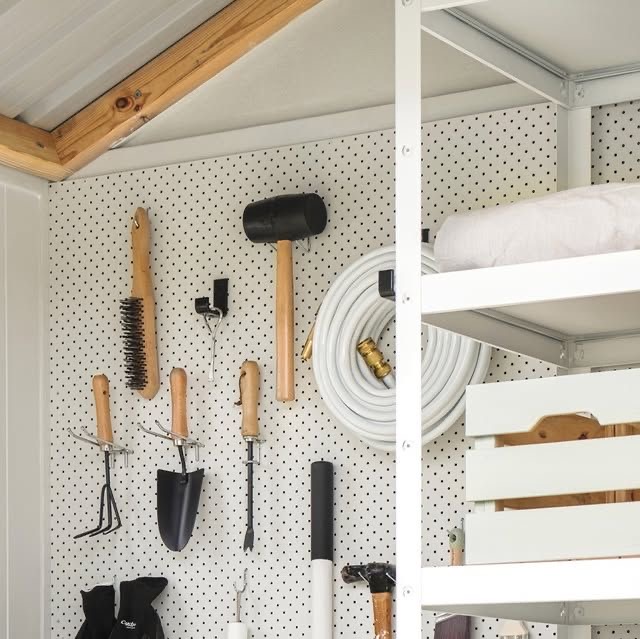
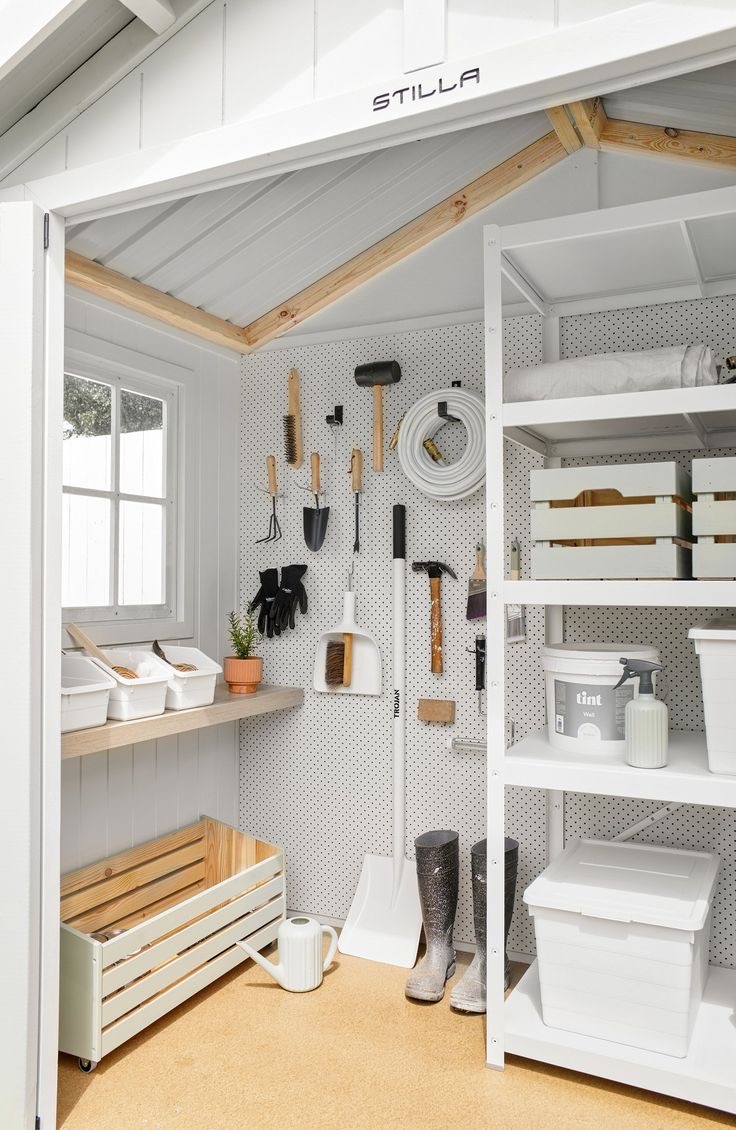
Now, with a clean slate, let’s talk about creating ideal shed storage solutions. The key here is to maximise vertical space. The walls are your greatest untapped resource. Install shelving units – heavy-duty options for tools and paint cans, and lighter ones for smaller garden supplies or empty pots. Adjustable shelving offers fantastic flexibility for different-sized items. Pegboards are brilliant for hanging hand tools, brushes, and small items, keeping them visible and off the workbench. Outline tools on the pegboard with a marker to create a shadow board, making it easy to see where everything belongs – a top tip for easy tool organisation.
Step 5 – Storage Tools
Consider various storage tools to achieve optimal organisation. Clear plastic storage bins with lids are invaluable. They protect contents from dust, moisture, and pests, and allow you to see what’s inside at a glance. Labeling is non-negotiable! Use sturdy, weather-resistant labels (or even permanent marker directly on the bins) to clearly identify contents. This prevents endless rummaging and is crucial for efficient shed storage. For long-handled tools like rakes, shovels, and brooms, dedicated wall-mounted racks or hooks are far better than leaning them in a corner where they can fall and become tripping hazards. Bike hooks are also excellent for getting bicycles, ladders, or hoses off the floor.
Step 6 – Workspace
If your shed doubles as a workspace or potting area, consider a workbench with integrated storage. Many workbenches come with drawers or shelves underneath, providing dedicated spots for small parts, hardware, or potting supplies. This creates a functional zone within your shed, promoting efficiency. Don’t forget about overhead storage solutions if your shed ceiling allows. Overhead racks or even a small loft can be perfect for bulky, seasonal items like Christmas decorations, camping gear, or extra timber that you don’t need frequent access to.
Step 7 – Pest Control
Finally, think about shed pest control storage. Rodents and insects love cluttered, dark sheds. By decluttering and elevating items off the floor into sealed containers, you’re making your shed less appealing to pests. Seal any gaps or cracks in the shed’s structure with caulk or expanding foam. Consider placing natural deterrents like peppermint oil-soaked cotton balls or investing in ultrasonic pest repellents. Keep the area immediately around your shed clear of overgrown weeds, wood piles, or debris that could offer shelter to pests.
By committing to this detailed process of emptying, decluttering, cleaning, and strategically organising, your shed will transform from a chaotic storage unit into a highly functional and efficient space. It’s an investment of time that pays dividends in convenience, reduced stress, and the sheer joy of easily finding what you need when you need it.
————————————–
Do you live in Brisbane? Before investing your time in cleaning try our cleaning service. Our domestic spring cleaning can help out by cleaning, decluttering and organising your home to prep it for a more regular cleaning service. We also provide apartment cleaning, bond cleaning, pre-sale cleaning, carpet cleaning and many other cleaning services in Brisbane.
If the thought of cleaning is just too much call our Nest Cleaners and we would love to help!
BOOK NOW: Call 0438 079 996 OR Online Estimate with Nest Cleaning in Brisbane, Australia

